Saturday, March 8, 2014
To Dig or Not to Dig Are No Dig Planting Methods for Real
 |
| photo by Jim Richardson, National Geographic |
One recent garden trend that is spreading with inexorable speed is the “no-dig” or “no-till” method of planting. The basic idea is that plants are installed directly into the ground without tilling or turning over the soil. While this method is centuries old, it challenges conventional gardening practices of tilling and breaking in the soil before one plants.
I’ve been aware of this method for a while, but have been surprised by how quickly it has become dogma, particularly within sustainable landscape circles. When teaching a class on soil preparation, I mentioned tilling and watched as many of the students recoiled in protest. “Isn’t tilling bad?” one student immediately asked. I was taken aback. ‘No-dig’ is not just an idea, but a doctrine, a creed, a badge of one’s eco-credentials. Proponents spread the message with revolutionary fervor.
So is it time to put your tiller on Craigslist? Let me weigh in on this complex issue and hopefully provide some clarity. The gardening world has more than its fair share of old wives tales and superstitions. This is particularly true with anything regarding soil. We understand so little about what goes on in the soil, yet we dig, till, fertilize, and amend it with reckless zeal. When it comes to soil cultivation, what’s true?
Here’s the bottom line: ‘no-dig’ is great, but not when the soil is severely compacted.
After going through quite a bit of research, the evidence certainly favors the ‘no-dig’ approach. Part of me really wanted to find flaws with this method; after all, breaking the soil before planting just feels so natural, so downright human. Egyptian paintings 1200 years bc show people plowing fields. But the evidence generally supports the wisdom of not digging. Why?

Soil is the weathered mantle of the earth. It is not really even a solid, but a mix of mineral solids (45%), organic matter (5%), and water and air (25%). In its undisturbed state, soil is generally layered with the top few inches containing organic matter, the next few inches containing topsoil (soil that is mixed with organic matter), below that subsoil (generally denser and less organic), below that decomposed rock, and below that rock. This basic structure is vitally important to plants, as this layering creates large pores (macropores) through which air and water move. In addition, soil’s layered horizons create a living network of bacteria, fungus, molds, and other critters that symbiotically support plant growth. Plant roots move through soil pores, following the air and water. Plants grow their roots by connecting their root hairs onto mycorrhizal webs in the soil. These fungi supply plants with nutrients and water while in return, they obtain sugars from the plant through photosynthesis. At least 95% of plants are known to use mycorrhizal webs.
 |
| Mycorrhizae attach to roots |
Tilling and digging disrupt this vital soil network. When you sink a shovel in the ground and flip the soil over, you break the mycorrhizal network. When you till, you may be breaking the soil into fine enough particles that it compacts even more, obliterating many of the necessary pores in the soil. In fact, studies have shown that plants grown without tilling initially outperform plants grown in tilled soil. At a larger scale, no-tillage agriculture has been proven to reduce erosion, increase crop yields, and decrease greenhouse gasses.
So should you get rid of that tiller? Not just yet. While the ‘no-dig’ method is generally a good way to plant, it does not work well in heavily compacted soils. Compacted soils are common in human-disturbed landscapes. Soils can get compacted enough that air and water no longer move through it. Soils compacted to this level are deadly to plants. If you plan to plant in heavily compacted soils, some method of decompaction—subsoiling, tilling, or aeration—is absolutely necessary. Think throwing organic matter on top is good enough? No way. The problem with severe compaction is that it never goes away. If air and water can’t move through it, it will not cure itself.
How can you tell if your soil is compacted enough to justify decompaction? One of the simplest tools is a hand-held penetrometer. This device has a rod that gets shoved into the ground and measures the resistance in pounds per square inch. A small dial on the top will let you know what psi the soil is. Generally anything above 250 psi should be decompacted. Penetrometers cost a few hundred bucks, so they’re definitely worthwhile for a large site, or if you evaluate a lot of sites (all you landscape architects out there—get one for your firm). But penetrometer are crude tools and vary somewhat depending on the velocity you shove it in the ground. Other ways of measuring soil compaction is through Proctor test. Generally anything above 85% proctor will inhibit root growth.
 |
| Photo by William Cullina shows the effects of organic matter on post construction site. The soil on the left received no organic matter. The soil in the middle had organic matter added only to the top few inches. The soil on the right had organic matter incorporated throughout. |
Don’t want to bother with complicated compaction equipment? The simplest way to test for compaction is to shove a pointed rod or stick into the ground. If it can easily penetrate the ground to a depth of 8-12”, your soil is probably fine. If it can’t, you may need to consider some method of decompaction.

The bottom line is that ‘no-dig’ and ‘no-till’ methods are great for relatively healthy soils. But if you have a site in an urban area, or one that is under construction, expect compacted soils. The best way to address deep compaction is to use some kind of subsoiling equipment. Tillers breaks up soil into fine particles that ultimately compact more densely. Subsoilers rip the earth--like a knife going through butter--in vertical lines that preserve the soil structure, while at the same time allowing air and water to pass through hardpan. Subsoiling equipment is typically attached to a tractor, but in smaller sites any kind of trencher (like an irrigation trencher) will have the same effect. Subsoil in lines 18-24" apart in both directions. When subsoiling, check for underground utililties prior to ripping the soil.
If you plan to address compaction by adding organic matter, one must add enough organic matter (or topsoil, sand, peat moss) to make a difference. Don’t just sprinkle some compost in the planting hole—this does almost nothing. Organic amendments must be mixed to a depth of 18 inches minimally and enough added to reach 25 percent by volume in sandy loam or 50 percent by volume in clay in order to make a positive change in bulk density and macroporosity. Decompacting soils is expensive and labor intensive, but worth it in the long run.
But if you have relatively healthy garden soil free of compaction, try a ‘no-dig’ approach. It’s actually much easier, and you will be surprised by the results.
Plant Flowers to Climb Your Garden Obelisks
Annual and perennial vines have long been used to cover unsightly walls or structures in the landscape. The vines soften the hard architectural lines of fences and buildings. They create living sculptures of other structures, such as Garden Obelisks, ramshackle sheds, outbuildings, tree stumps, and assorted "cast-offs" given new life in the Garden.
Use Garden Obelisks to create a vertical growing space for annual or perennial vines where there is no existing structure for the vines to grow upon. Make them the centerpiece of a perennial Garden, line them up to define the border of an annual flower bed, or to separate Garden "rooms." Planted with brightly colored flowering vines, Garden Obelisks are an imposing presence in the landscape.
Grow these annual and perennial flowering vines on your Garden Obelisks:
Morning glories and/or moonflowers: Members of the sweet potato family, they open their blossoms only at certain times of days: the flowers of morning glories, Ipomoea purpurea, open in the early morning and close by midday. Moonflowers, I. alba, open in late afternoon, stay open all night and close shortly after dawn. Plant both kinds to climb up the same structure and enjoy blooms from late afternoon through mid-morning. Start seeds indoors for the earliest blooms.
Ornamental sweet potatoes: Distinguished by their colorful foliage, ornamental sweet potato, Ipomoea batatus, vines grow 12 feet or more in length over the course of a growing season. Available in varieties with foliage in red, bronze or various colors of green, including chartreuse. Their leaves look just like those of edible sweet potatoes. They are often included in container Gardens, Planted near the edge of the pot to cascade over the sides. Ornamental sweet potatoes will quickly grow to cover even the tallest Garden Obelisks.
Clematis and autumn clematis: Often called the queen of vining flowers, clematis, Clematis paniculata, produces light lavender blossoms on woody vines. Its cousin, autumn clematis, C. maximonowicziana, produces smaller, less showy, but more fragrant flowers in autumn. Both types of clematis prefer morning sun and protection from the afternoon sun, although autumn clematis is more tolerant of all-day sun. Mulch them well, they prefer their roots kept cool and evenly moist.
Honeysuckle: A prolific flowering vine, honeysuckle, Lonicera sempervirens, also called "coral honeysuckle," quickly grows to cover any Garden structure. It produces many tiny, trumpet-shaped, coral, yellow or red, fragrant flowers from mid-spring through autumn. Native to the Americas, coral honeysuckle grows best in sun to partial shade. Do not Plant Japanese honeysuckle, L. japonica, as it is a rampant, invasive vine that has escaped cultivation in North America.
Climbing hydrangea: A shade-loving flowering vine, climbing hydrangea, Hygdrangea anomala subsp. petiolaris, is relatively care-free. Its large, white flowers bloom in summer and look just like the flowers of shrub-like hydrangeas. The vines are woody and can become quite heavy on a large specimen; ensure any Garden Obelisks or other support structures it grows upon are substantial and secure. Mulch their soil and keep them evenly moist for the greatest number of flowers.
Covered with any of these flowering vines, Garden Obelisks become living art in your landscape.
Copyright Sharon Sweeny
Sharon Sweeny specializes in all things Gardening, as well as self-sufficient, do-it-yourself lifestyles. Read more about intensive Gardening at http://moxieGardener.com and decorative Garden structures at http://eGardenObelisks.com.
Read More..
Use Garden Obelisks to create a vertical growing space for annual or perennial vines where there is no existing structure for the vines to grow upon. Make them the centerpiece of a perennial Garden, line them up to define the border of an annual flower bed, or to separate Garden "rooms." Planted with brightly colored flowering vines, Garden Obelisks are an imposing presence in the landscape.
Grow these annual and perennial flowering vines on your Garden Obelisks:
Morning glories and/or moonflowers: Members of the sweet potato family, they open their blossoms only at certain times of days: the flowers of morning glories, Ipomoea purpurea, open in the early morning and close by midday. Moonflowers, I. alba, open in late afternoon, stay open all night and close shortly after dawn. Plant both kinds to climb up the same structure and enjoy blooms from late afternoon through mid-morning. Start seeds indoors for the earliest blooms.
Ornamental sweet potatoes: Distinguished by their colorful foliage, ornamental sweet potato, Ipomoea batatus, vines grow 12 feet or more in length over the course of a growing season. Available in varieties with foliage in red, bronze or various colors of green, including chartreuse. Their leaves look just like those of edible sweet potatoes. They are often included in container Gardens, Planted near the edge of the pot to cascade over the sides. Ornamental sweet potatoes will quickly grow to cover even the tallest Garden Obelisks.
Clematis and autumn clematis: Often called the queen of vining flowers, clematis, Clematis paniculata, produces light lavender blossoms on woody vines. Its cousin, autumn clematis, C. maximonowicziana, produces smaller, less showy, but more fragrant flowers in autumn. Both types of clematis prefer morning sun and protection from the afternoon sun, although autumn clematis is more tolerant of all-day sun. Mulch them well, they prefer their roots kept cool and evenly moist.
Honeysuckle: A prolific flowering vine, honeysuckle, Lonicera sempervirens, also called "coral honeysuckle," quickly grows to cover any Garden structure. It produces many tiny, trumpet-shaped, coral, yellow or red, fragrant flowers from mid-spring through autumn. Native to the Americas, coral honeysuckle grows best in sun to partial shade. Do not Plant Japanese honeysuckle, L. japonica, as it is a rampant, invasive vine that has escaped cultivation in North America.
Climbing hydrangea: A shade-loving flowering vine, climbing hydrangea, Hygdrangea anomala subsp. petiolaris, is relatively care-free. Its large, white flowers bloom in summer and look just like the flowers of shrub-like hydrangeas. The vines are woody and can become quite heavy on a large specimen; ensure any Garden Obelisks or other support structures it grows upon are substantial and secure. Mulch their soil and keep them evenly moist for the greatest number of flowers.
Covered with any of these flowering vines, Garden Obelisks become living art in your landscape.
Copyright Sharon Sweeny
Sharon Sweeny specializes in all things Gardening, as well as self-sufficient, do-it-yourself lifestyles. Read more about intensive Gardening at http://moxieGardener.com and decorative Garden structures at http://eGardenObelisks.com.
Friday, March 7, 2014
landscape design photos
One of the most frequent searches on my own site is regarding pictures regarding landscaping. So I understand that a lot of folks depend upon photos regarding other peoples patterns to get tips. But concurrently, while I will have a large photograph directory involving other peoples jobs on my website, the most common queries I acquire are still associated with specific styles and design and style ideas.
It seems apparant that with as much pictures regarding landscaping there are to consider online, almost everybody could find an in depth match to their own personal property that may be copied. You would have it so.....in case every backyard was sq . or rectangle-shaped. However, in fact most meters arent sq or square. So despite the unlimited landscaping ideas and illustrations out there, will still be highly improbable that youll locate an exact complement to the form of your property.
Never tell anybody... but even while a professional, My spouse and i still make use of pictures associated with other peoples landscaping just as one educational oral appliance to get fresh ideas. Nonetheless, unlike many people, I dont seek out an exact concept to copy. We look for distinctive, creative, along with new concepts and pieces in the puzzle.
Today heres a suggestion and the indicate this entire post.
When looking at photos of landscaping, take notice of the details, tips, and rules that are general to most styles. Look for things that are common and also repeated frequently by diverse designers. Fundamental essentials elements that appear to be good since theyre generally determined by basic principles involving art. Fundamental essentials things that will most likely incorporate effectively into your very own design undertaking regardless of design.
Other peoples landscaping pictures make the perfect design instrument to help you get assembling your project done. Even so, instead of hopelessly trying to find your precise layout, be lent several tips from several diverse designs. You will save yourself a large amount of frustration this will let you much better possibility of creating some thing unique in your own residence.
 |
| landscape design photos |
It seems apparant that with as much pictures regarding landscaping there are to consider online, almost everybody could find an in depth match to their own personal property that may be copied. You would have it so.....in case every backyard was sq . or rectangle-shaped. However, in fact most meters arent sq or square. So despite the unlimited landscaping ideas and illustrations out there, will still be highly improbable that youll locate an exact complement to the form of your property.
Never tell anybody... but even while a professional, My spouse and i still make use of pictures associated with other peoples landscaping just as one educational oral appliance to get fresh ideas. Nonetheless, unlike many people, I dont seek out an exact concept to copy. We look for distinctive, creative, along with new concepts and pieces in the puzzle.
Today heres a suggestion and the indicate this entire post.
When looking at photos of landscaping, take notice of the details, tips, and rules that are general to most styles. Look for things that are common and also repeated frequently by diverse designers. Fundamental essentials elements that appear to be good since theyre generally determined by basic principles involving art. Fundamental essentials things that will most likely incorporate effectively into your very own design undertaking regardless of design.
Other peoples landscaping pictures make the perfect design instrument to help you get assembling your project done. Even so, instead of hopelessly trying to find your precise layout, be lent several tips from several diverse designs. You will save yourself a large amount of frustration this will let you much better possibility of creating some thing unique in your own residence.
 |
| landscape design photos front house |
 |
| desert landscape design photos |
 |
| backyard landscape design photos |
Fab Late Season Annuals
My favorite selections from a year of experimentation

Tagetes patula ‘???’ (1m tall)
A three-foot tall marigold on loose, ferny foliage?! This strain of French marigolds is a marigold that even marigold-haters would love. I collected this seed from a friend who apparently mail ordered it from California. Most marigolds are dumpy little bedding plants; this little lovely grows two to four feet tall on beautiful finely-cut foliage. After years of lusting after Tagetes ‘Cinnabar’ at Great Dixter, I’m thrilled to finally have one of these loose, landscape marigolds. Some sources say it may be a Himalayan cultivar; others say it a true French strain. Single orange and red flowers grow on top of a plant that more closely resembles an aster in form than a marigold. Blooms July to November and re-seeds readily. This year, I tucked this in a few late season holes. Next year, I will feature this annual front and center. Annies Annuals have several varieties of this type of marigold (Villandry & one called ‘Gina’s Himalayan’). Sarah Raven features ‘Linnaeus,’ a looser variety of this marigold with deep amber colored flowers.
Several years ago I grew the straight species Tithonia rotundifolia and was delighted with the result. The color orange of these daisy-like blooms is so pure, it almost glows. A real butterfly magnet. The only problem was that this annual grew eight-feet tall and six-feet wide—taking up much more real estate than I could stand. But thanks to Swallowtail Garden Seeds, a compact version called ‘Fiesta del Sol’ is available that tops out about thirty inches (75cm) tall. The best part is that this annual never sags in the heat. Looks as good in 110 heat index afternoons as it does in late November.
Cosmos ‘Psyche’ Series
After trialing many different types of Cosmos, my favorite by far is the Psyche series. Here’s my advice: don’t select Cosmos for height or color; instead, go for bloom size. The Psyche series has blooms 3-4 inches wide. That’s four times the size of some of the other varieties, one of the largest of Cosmos bipinnatus species. I’m not generally a fan of double blooms (they always look a bit over-bred), but these double blooms are frilly without being precocious. The densely ferny foliage is a real plus for this series as well--not at all leggy like some Cosmos, but instead ferny and lush These high-spirited, vigorous cosmos evoke late summer exuberance like few other plants. Grows three to four feet tall. Very long lasting. Swallowtail Garden Seeds.
Dahlia ‘Arabian Night’
When it comes to dahlias, there are a million beauties. But ‘Arabian Night’ is a classic—the Sophia Loren of dahlias. The plant seduces with its velvety texture and smoldering red color. It’s hard to describe the allure of the color. The flowers open a dark cherry red then mature into a deep currant-color (almost black), creating the illusion of shadow even in the full sun. The effect is flirty yet deadly. If temptation itself were a color, this would be it. Grows 36 inches tall. Brent and Beckys Bulbs.
The wet spring and early summer has been a blessing and curse in the border this year. Moist-loving perennials like Mondarda and Eupatorium have swelled to gigantic proportions, growing several feet higher than theyve grown in the past two years. All the while, my drier-loving perennials have melted with fungus and mildew. Ive just finished ripping out several dozen fungus-covered Perovskia and Agastache ‘Black Adder’. It’s funny, because if you asked me last year what kind of plants would be on my list of “plants of the future”—that is, climate change worthy plants--I probably would have listed those two. But one wet season and they are gone.
I have long complained that summers in Washington, D.C. area are essentially subtropical. While perennial gardeners in cooler climates like Maine, England, and the Netherlands enjoy spectacular bonanzas of July and August blooms, we humidity-bound gardeners watch all but the most thuggish of our perennials flop and generally poop out. Of course, it is entirely possible to have a beautiful late season perennial garden in the mid-Atlantic; it is just hard to have both a beautiful early season and late season perennial garden here—particularly for space-challenged gardens. Our growing season is so stretched out (with a thirty degree temperature differential); what looks good in May most definitely does not look good in August and vice versa.
So this year, Ive invested heavily in annuals and tropicals to pump up the late season border. I can’t tell if my foray into annuals and tropical is a strategic master-stroke or a sign that I have slipped too deep into horticultural self-indulgence. Whatever my diagnosis, Ive learned quite a bit this year about combining these plants in perennial garden—including quite a few missteps (such as giant Colocasias shading out half a dozen sun-loving plants). But there have been enough happy accidents that I thought I’d share a few of the better moments. Ive seeded almost two dozen different plants this year and tried a range of different tropicals. Here are my favorites:
 |
| Tagetes Cinnabar courtesy of Gardens Illustrated |
Tithonia ‘Feista del Sol’
 |
| image by Jule Dansereau |
Cosmos ‘Psyche’ Series
 |
| image courtesy of Berkshire Botanical Garden |
Dahlia ‘Arabian Night’
 |
| Early color starts cherry red but deepens to almost a black |
Ensete ventricosum maurellii, Red Abyssinian Banana
 |
| Ensete maurellii next to Persicaria polymorpha in my garden. The banana has tripled in size since this photo was taken |
No other banana variety compares. Each leaf can grow four to eight feet long, making a stunning silhouette in the back of the border. The absolute best feature of this banana is the high gloss, burgundy foliage of the stems and undersides of the leaves. Something about this color that blends incredibly well with grasses and other blooming perennials. Red Abyssinian Banana has one of the best silhouettes of any of the banana selections, much more compact and dense than many of the Musa genus which eventually look like palm trees. This is one of the more pleasurable plants Ive ever grown. Too bad it won’t survive the winter. Plant Delights Nursery.
Model Homes Columbia MD


* photos taken on June 10 2011


* photos taken on Aug 12 2011


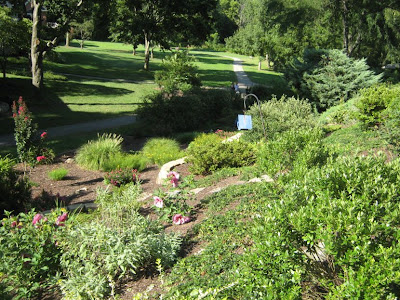


* photos taken on Aug 18 2011


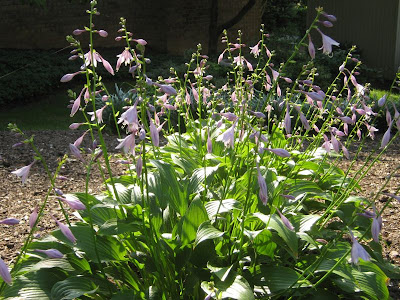


* photos taken on Sep 15 2011


* photos taken on Mar 17 2012


 * photos taken on April 4 2012


* photos taken on April 14 2012 in Columbia, MD


 * photos taken on April 27 2012

* photos taken on June 7 2012 in Columbia, MD


 * photos taken on June 14 2012


 * photos taken on Aug 17 2012


* photos taken on May 4 2013


* photos taken on May 15 2013


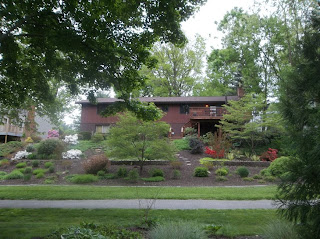
* photos taken on May 18 2013


* photo taken on June 10 2013


* photos taken on June 18 2013


* photos taken on July 9 2013


* photos taken on July 25 2013


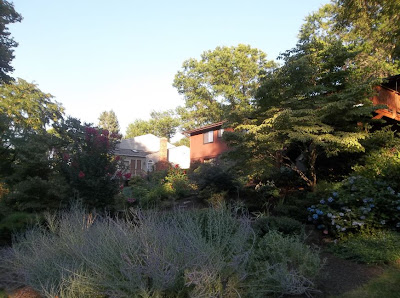
* photos taken on Aug 18 2013


Subscribe to:
Posts (Atom)